
Most homeowners don’t give their electrical panel a second thought, until the lights flicker when the AC kicks on, or a breaker trips every time someone plugs in a space heater. That gray metal box humming away in the basement or garage is the heart of a home’s electrical system, and if it’s outdated, undersized, or struggling to keep up with modern demands, it’s a problem that won’t fix itself. Upgrading an electrical panel isn’t glamorous work, but it’s one of the most practical investments a homeowner can make for safety, capacity, and resale value. This guide walks through the why, when, and how of electrical panel upgrades, from spotting warning signs to understanding costs and navigating the process with a licensed pro.
Table of Contents
ToggleKey Takeaways
- An electrical panel upgrade replaces your outdated breaker box to handle modern appliances, EV chargers, and HVAC systems while improving home safety and preventing fire hazards from faulty panels.
- Watch for warning signs like frequent breaker trips, flickering lights, burning smells, or warm panels—these indicate your electrical system is struggling and needs professional evaluation.
- Most homeowners should budget $1,500 to $4,000 for a standard 200-amp panel upgrade, though complex installations in high-cost areas can exceed $5,000.
- The upgrade process typically takes 1–3 days with power off for 4–8 hours, and requires permits, utility coordination, and final inspection by a building inspector to ensure code compliance.
- Never attempt an electrical panel upgrade as a DIY project—always hire a licensed, bonded, and insured electrician to ensure proper installation, meet legal requirements, and protect your home insurance coverage.
- A 200-amp panel is the ideal choice for most single-family homes, providing sufficient capacity for current needs and future additions without the cost of larger systems.
What Is an Electrical Panel Upgrade and Why Does It Matter?
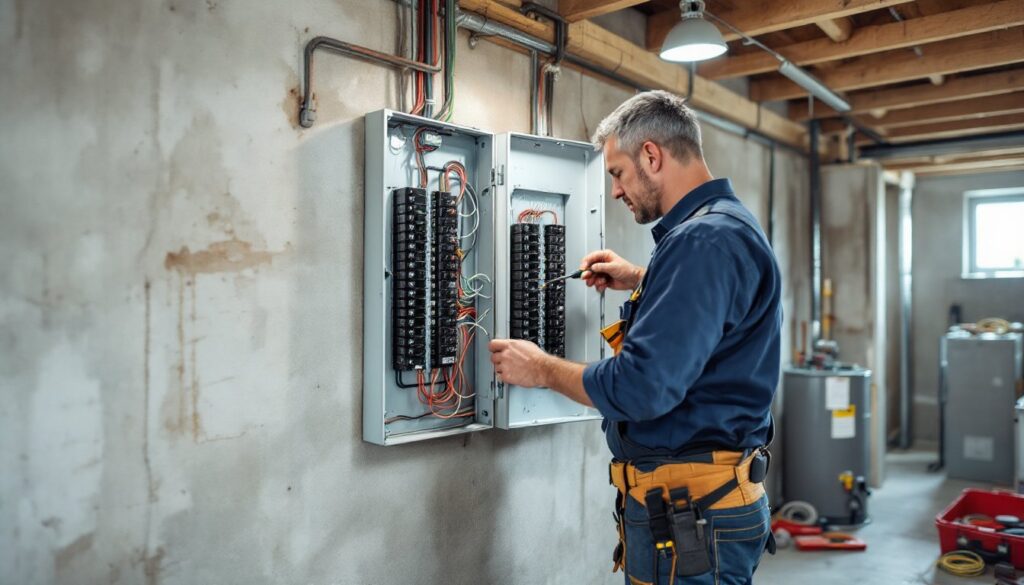
An electrical panel upgrade replaces the existing breaker box and, often, the service entry cables from the utility meter to the panel. The panel houses circuit breakers that control and protect individual circuits throughout the home. Older homes may have 60-amp or 100-amp service, which was adequate decades ago but struggles under the load of modern appliances, EV chargers, home offices, and HVAC systems.
Upgrading typically means installing a 200-amp panel, which provides headroom for current and future electrical needs. It also allows homeowners to add dedicated circuits for heavy-draw appliances like electric dryers, tankless water heaters, or workshop equipment without risking overloads.
Beyond capacity, an upgrade addresses safety. Panels with Federal Pacific Electric (FPE) or Zinsco breakers, common in homes built between the 1950s and 1980s, are known fire hazards due to breakers that fail to trip under fault conditions. Replacing these panels eliminates a serious risk. Also, modern panels comply with the National Electrical Code (NEC), which updates every three years to reflect safer wiring practices and grounding standards.
Signs It’s Time to Upgrade Your Electrical Panel
Not every electrical hiccup means the panel needs replacing, but certain symptoms point directly to an inadequate or failing system. Here’s what to watch for:
- Frequent breaker trips: If circuits trip regularly, especially when running multiple appliances, the panel can’t handle the load.
- Flickering or dimming lights: Lights that dim when a major appliance starts indicate voltage drops caused by insufficient capacity.
- Burning smell or scorch marks: Any odor of burning plastic or discoloration around breakers is a fire risk and demands immediate attention.
- Warm or buzzing panel: Panels should run cool and silent. Heat or buzzing suggests loose connections or overloaded circuits.
- Outdated fuse box: Homes still using screw-in fuses instead of breakers need a full upgrade. Fuses can’t handle modern electrical loads and lack the safety features of circuit breakers.
- Renovations or new appliances: Adding a kitchen remodel, EV charger, hot tub, or central air often requires more circuits and amperage than an old panel can provide.
- Two-prong outlets throughout: This typically signals an ungrounded system with knob-and-tube or early Romex wiring, often paired with an ancient panel.
Many of these issues are covered in detailed safety assessments that help homeowners identify when professional evaluation is warranted. If the home was built before 1990 and the panel has never been upgraded, it’s worth having a licensed electrician inspect it.
Understanding the Costs: What to Budget for an Electrical Panel Upgrade
The cost to upgrade an electrical panel varies widely based on location, scope, and existing conditions, but most homeowners spend between $1,500 and $4,000 for a standard residential upgrade to 200-amp service. Here’s how the numbers typically break down:
- Panel and materials: A quality 200-amp breaker panel runs $200–$500. Additional costs include breakers, conduit, wire, grounding rods, and weatherhead components.
- Labor: Licensed electricians charge $75–$150 per hour, and a straightforward upgrade takes 6–10 hours. Complex jobs, like relocating a panel, trenching for new service entry, or upgrading from overhead to underground service, add time and cost.
- Permit and inspection fees: Most jurisdictions require a permit for panel upgrades, typically $50–$200. The electrical inspector will verify code compliance before signing off.
- Utility coordination: If the service entrance cable or meter base needs upgrading, the utility company may need to disconnect and reconnect service. Some utilities do this at no charge: others bill a reconnection fee.
- Subpanel or additional circuits: Homes with detached garages, workshops, or additions may need a subpanel, adding $500–$1,500 to the total.
Factors that push costs higher include aluminum wiring remediation, asbestos panel enclosures, or outdated main disconnect hardware. Homes in high-cost metro areas or those requiring extensive electrical service panel upgrade work, such as replacing the weatherhead, mast, or meter base, can see totals approach $5,000–$8,000.
Many homeowners wonder, “How much does it cost to upgrade an electrical panel?” The honest answer is that every home is different. Getting three quotes from licensed electricians ensures competitive pricing and lets homeowners compare scope, timeline, and warranty terms. Platforms like HomeAdvisor can connect homeowners with pre-screened local electricians.
The Electrical Panel Upgrade Process: What to Expect
Understanding the workflow helps homeowners plan around the disruption and know what questions to ask. Here’s the typical sequence:
- Initial assessment and quote: The electrician inspects the existing panel, service entry, grounding, and main disconnect. They’ll note the amperage, panel brand, breaker count, and any hazards. Expect a detailed written estimate.
- Permitting: The contractor pulls the permit and submits plans to the local building department. Turnaround varies, some jurisdictions issue permits same-day: others take a week or more.
- Utility notification: The electrician coordinates with the power company to schedule a temporary disconnect. Some areas allow hot panel swaps, but most require the meter to be pulled during installation.
- Panel installation: The crew disconnects the old panel, installs the new box, mounts breakers, and connects circuits. This includes running a new grounding electrode conductor to grounding rods or the water main, and bonding neutral and ground per NEC standards.
- Service entry upgrade (if needed): If amperage is increasing, the service entry cable (often aluminum SE cable sized 2/0 or larger) and weatherhead may be replaced.
- Reconnection and testing: Once wiring is complete, the utility reconnects the meter. The electrician energizes the panel, tests all circuits, and verifies proper voltage and grounding.
- Final inspection: The building inspector reviews the installation for code compliance. After approval, the permit is closed.
The whole process typically takes 1–3 days, depending on complexity. Power is usually off for 4–8 hours during the swap, so plan accordingly, especially if working from home or have medical equipment that requires electricity.
Permits, Inspections, and Code Requirements
An electrical panel upgrade is not a DIY project, and it’s not something to hide from the local building department. Permits exist to ensure safety and code compliance. The National Electrical Code (NEC) governs panel installations nationwide, but local amendments and interpretations vary by jurisdiction.
Key code considerations include:
- Ampacity and wire sizing: Service conductors must be sized for the panel’s rating (e.g., 200-amp service requires 2/0 copper or 4/0 aluminum).
- Grounding and bonding: The neutral and ground must be bonded at the main panel only. Subpanels require isolated neutral bars.
- AFCI and GFCI protection: Modern codes mandate arc-fault circuit interrupters (AFCI) for most living areas and ground-fault circuit interrupters (GFCI) for kitchens, baths, garages, and exterior circuits.
- Working clearances: NEC Article 110.26 specifies minimum clearances in front of panels, typically 3 feet of clear space.
- Panel height: Breakers must be accessible, with the highest handle no more than 6 feet 7 inches above the floor.
Inspectors check for proper torque on breaker lugs, correct wire terminations, labeling, and grounding continuity. Failing inspection can delay occupancy or resale, so hiring a qualified electrician who knows local codes is essential.
Choosing the Right Panel Size and Type for Your Home
Not all panels are created equal, and choosing the right one depends on current load, planned additions, and long-term goals.
Amperage: For most single-family homes, 200-amp service is the sweet spot. It supports central HVAC, electric ranges, dryers, multiple bathrooms, and future additions like EV chargers or solar inverters. Smaller homes with gas appliances and no plans for major electrical upgrades might get by with 150-amp service, though it limits flexibility. Large homes with extensive shop equipment, multiple HVAC zones, or whole-home backup generators often need 400-amp service with a split-bus or dual-panel setup.
Circuit count: Panels come in various configurations, 20-circuit, 30-circuit, or 40-circuit boxes. Count existing circuits and add a buffer for future needs. It’s cheaper to install extra breaker slots now than to add a subpanel later.
Panel brands: Reputable manufacturers include Square D (Schneider Electric), Siemens, Eaton (Cutler-Hammer), and GE. Avoid off-brand or obsolete panels. Stick with brands that offer readily available breakers and strong warranty support.
Main breaker vs. main lug: Most residential panels are main breaker panels, with a large breaker at the top that serves as the main disconnect. Main lug panels lack this breaker and are used as subpanels or in setups where the main disconnect is located elsewhere (like a separate exterior disconnect).
Indoor vs. outdoor: Outdoor-rated panels (NEMA 3R) allow the main disconnect to be accessible from outside, which some jurisdictions now require. Indoor panels are more common in basements and garages.
An electrician can calculate the home’s electrical load using the NEC’s standard method (Article 220) to determine the right panel size. This factors in square footage, appliances, heating/cooling, and anticipated future loads.
DIY vs. Hiring a Licensed Electrician: Safety and Legal Considerations
Here’s the blunt truth: upgrading an electrical panel is not a DIY project. Even experienced DIYers with wiring know-how should leave this to licensed professionals. Here’s why:
- Permit and inspection requirements: Most jurisdictions require a licensed electrician to pull permits for service upgrades. Inspectors won’t sign off on unpermitted or DIY work, which can complicate insurance claims or home sales.
- Utility coordination: Only licensed electricians or utility personnel can legally disconnect or reconnect the meter in most areas.
- Live voltage hazards: Even with the meter pulled, the service entry conductors from the weatherhead to the panel remain energized at 240 volts. Contact with these wires is potentially fatal.
- Code complexity: NEC rules around grounding, bonding, wire sizing, and protection devices are intricate. Mistakes create fire and shock hazards.
- Liability and insurance: Homeowner’s insurance may deny claims for electrical fires caused by unpermitted or unlicensed work.
That said, homeowners can still be involved. Ask the electrician questions, review the permit, and understand the scope of work. If cost is a concern, get multiple quotes and consider phased upgrades, for example, upgrading the panel now and adding circuits or a subpanel later.
For budgeting purposes, resources like ImproveNet offer cost breakdowns and contractor vetting tools to help homeowners plan the electrical panel upgrade cost and find qualified pros.
Safety first: Always verify the electrician is licensed, bonded, and insured. Ask for references and check reviews. A quality upgrade done right protects the home, the family, and future resale value.