
Installing a gas water heater isn’t rocket science, but it’s also not a Saturday afternoon quick-fix like replacing a faucet. This is a project that sits right on the line between DIY-friendly and call-a-pro territory. You’re dealing with gas lines, venting, and building codes, all things that demand respect and know-how. Get it right, and you’ll save several hundred dollars in labor costs while gaining confidence for future projects. Get it wrong, and you’re looking at potential gas leaks, carbon monoxide hazards, or failed inspections. This guide walks through the entire gas water heater installation process, from deciding whether to tackle it yourself to torquing down the final connection. Whether you’re upgrading to a more efficient model or replacing a failed unit, you’ll know exactly what’s involved before you drain the first gallon.
Table of Contents
ToggleWhen to DIY vs. Hire a Professional for Gas Water Heater Installation
The honest answer: most homeowners should hire a licensed plumber for gas water heater installation, especially if local codes require it. Many jurisdictions mandate permits and inspections for gas appliance work, and some explicitly require licensed professionals to perform the installation. Check with your local building department before committing to DIY.
That said, if you’re comfortable with basic plumbing, have experience working with gas lines, and your municipality allows homeowner installs with a permit, this is a manageable project. You’ll need mechanical aptitude, attention to detail, and willingness to follow code requirements to the letter.
Consider hiring a pro if:
- Local codes require licensed installation (common in many cities)
- You’re switching fuel types (electric to gas, or vice versa)
- The installation requires moving gas lines or venting paths
- You’ve never worked with gas lines or don’t own a pipe threader
- The water heater is in a difficult location (attic, crawlspace, tight closet)
DIY may be appropriate if:
- You’re doing a like-for-like replacement in an accessible location
- Existing gas line, venting, and water connections are in good condition and properly sized
- You can obtain the required permit and schedule the inspection
- You have experience with pipe fitting and threading (or will use flexible connectors approved by code)
- You have a helper, water heaters are heavy and awkward
The gas water heater installation cost for professional work typically ranges from $800 to $2,200, depending on your region, tank size, and complexity. A standard 40 gallon water heater installation cost with labor runs $1,200–$1,800 in most markets. That hot water heater installation cost includes removal of the old unit, installation of the new one, and code-compliant connections. DIY can cut that by 40–60%, but only if you do it safely and legally.
Essential Tools and Materials You’ll Need
Having the right tools on hand before you start prevents mid-project hardware store runs and keeps the job moving.
Tools:
- Pipe wrenches (two, 12″ and 18″)
- Adjustable wrench (10″ or 12″)
- Tubing cutter for copper lines
- Hacksaw (backup for cutting pipe)
- Level (torpedo or 2-foot)
- Screwdrivers (flathead and Phillips)
- Appliance dolly or heavy-duty hand truck
- Drill/driver with bits
- Garden hose for draining old tank
- Pipe thread compound or Teflon tape rated for gas (yellow)
- Voltage tester or multimeter (if disconnecting power to old unit)
Materials:
- New gas water heater (sized appropriately, typically 40 or 50 gallons for a family of four)
- Gas-rated flexible connector (if code allows: check local requirements, some areas require black iron pipe only)
- Water supply connectors (flexible stainless steel braided lines or copper, depending on existing setup)
- Temperature and pressure relief valve (T&P valve, often included with new heater)
- Discharge pipe for T&P valve (3/4″ copper or CPVC, terminating 6″ above floor)
- Vent pipe and fittings (if not reusing existing, must be Type B double-wall for atmospheric venting)
- Pipe joint compound (gas-rated)
- Earthquake straps (required in seismic zones)
- Drain pan (if heater is indoors above living space or required by code)
Don’t cheap out on connectors. Use materials explicitly rated for gas service, and verify they meet local code. The cost difference between code-compliant and generic parts is negligible compared to the risk.
Safety Precautions Before You Begin
Gas appliances demand respect. Follow these safety steps without exception.
Before touching anything:
- Turn off the gas supply at the shutoff valve on the gas line leading to the water heater. This is typically a lever-style valve, turn it perpendicular to the pipe (90°) to close.
- Turn off the water supply at the cold water inlet valve at the top of the tank.
- Shut off power if you have a power-vented unit (these use an electric blower). Even standard atmospheric vented units may have electrical ignition.
- Extinguish all open flames in the area and ensure adequate ventilation. Don’t smoke or use power tools that spark near gas lines.
- Let the tank cool for at least two hours before draining if it’s been in use. Hot water can scald.
Personal protective equipment:
- Safety glasses (mandatory when working overhead or cutting pipe)
- Work gloves (for handling the tank and rough edges)
- Steel-toed boots (a full water heater can weigh 300+ pounds)
Know the signs of a gas leak:
Natural gas is odorized with mercaptan (smells like rotten eggs). If you smell gas at any point, stop work immediately, open windows, evacuate, and call your gas utility from outside the home. Don’t flip light switches or use phones inside, they can create sparks.
Code compliance:
Even if you’re allowed to DIY, you still need a permit in most areas. The inspection isn’t punitive, it’s there to catch mistakes that could lead to carbon monoxide poisoning or fire. Don’t skip it.
Step-by-Step Gas Water Heater Installation Process
Removing the Old Water Heater
Start by draining the old tank completely. Attach a garden hose to the drain valve at the bottom of the tank and run it to a floor drain, sump, or outdoors. Open the valve and let it drain, this takes 20–40 minutes depending on sediment buildup. Open a hot water faucet somewhere in the house to break the vacuum and speed draining.
Once empty, disconnect the gas line. Use two pipe wrenches, one to hold the fitting on the heater’s gas valve steady, the other to turn the union or flare nut counterclockwise. If you have a flexible connector, this is straightforward. Black iron pipe requires unthreading at the union.
Next, disconnect the water lines. If you have flexible connectors, unscrew them at the tank. If you have soldered copper, you’ll need to cut the pipes a few inches above the tank with a tubing cutter, leave enough stub to work with for the new installation.
Disconnect the vent pipe. For atmospheric venting, this is usually a simple friction fit or screwed sheet metal connection at the draft hood on top of the heater. Slide it off carefully, old vent pipe can be brittle.
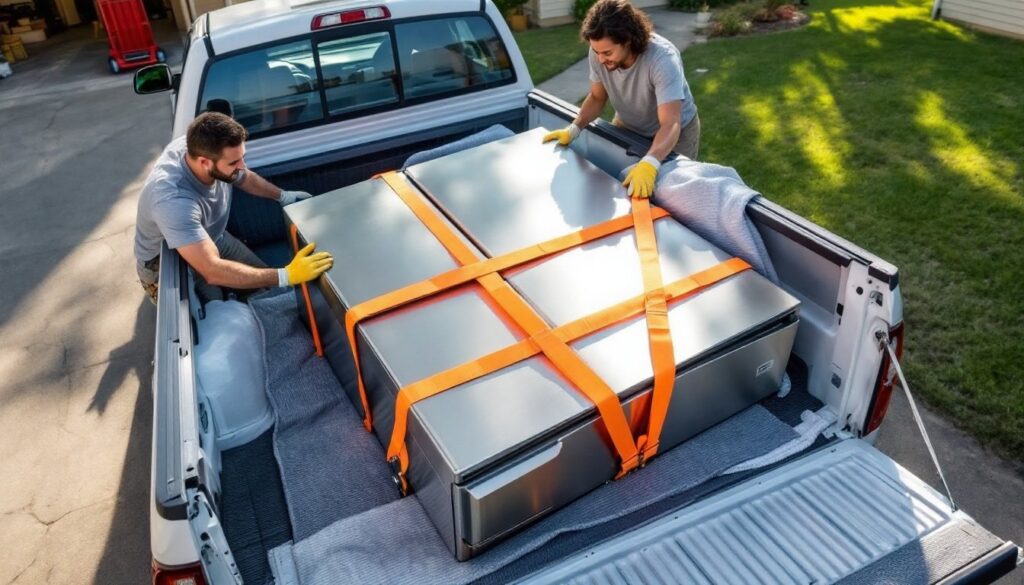
Now remove the old tank. Tilt it onto an appliance dolly and wheel it out. If it won’t fit through doorways upright, you may need to tip it nearly horizontal. Many local disposal services will haul away old water heaters for a small fee, or your new heater supplier may include removal.
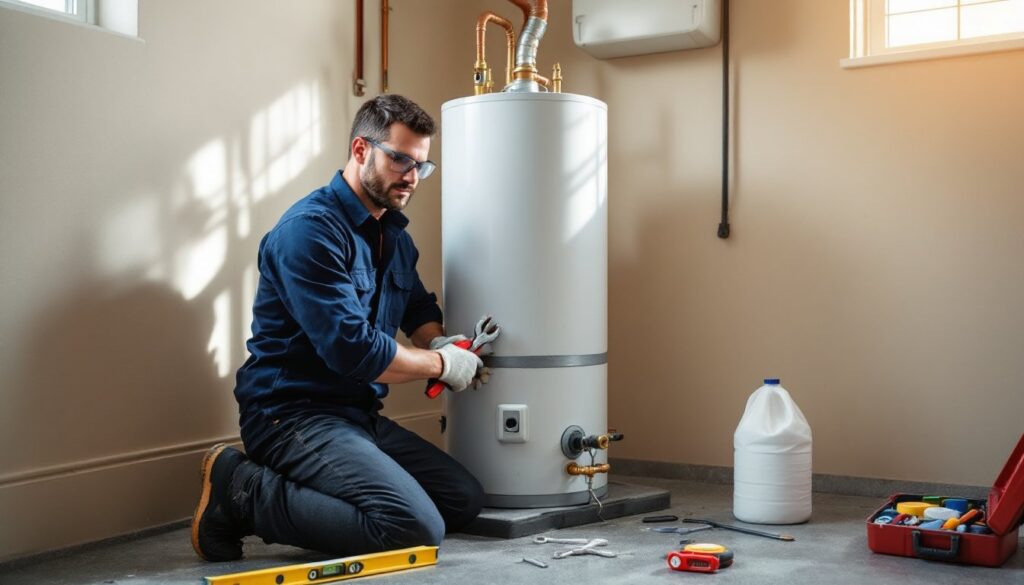
Installing and Connecting the New Unit
Position the new water heater in the same footprint as the old one. Use a level to ensure it’s plumb, this matters for proper venting and drainage. Some codes require a drain pan underneath, especially for units installed in attics, garages, or above finished spaces. If required, set the pan first and route the pan drain line to an appropriate termination point.
Install earthquake straps if you’re in a seismic zone (IRC requires them in certain areas). Secure two straps, one in the upper third of the tank, one in the lower third, anchored to wall studs or masonry with appropriate fasteners. Don’t skip this: a tipped water heater can rupture gas lines.
Connect the T&P relief valve if it’s not pre-installed. Thread it into the fitting on the side of the tank (hand-tight, then 1/4 to 1/2 turn with a wrench, don’t overtighten). Attach the discharge pipe, ensuring it terminates no more than 6″ above the floor or drain pan, with no threads at the end and no upward bends that could trap water.
Connect the water supply lines. If reusing copper stubs, you can use compression fittings or solder on new adapters. Flexible stainless braided connectors (3/4″) are easier and code-compliant in most areas. Attach the cold water line to the inlet (usually marked or on the right) and hot to the outlet. Hand-tighten, then snug with a wrench, don’t over-torque and crush the washers.
Connect the gas line. If using a flexible gas connector (CSST or corrugated stainless steel), ensure it’s rated and approved for your jurisdiction. Apply gas-rated pipe thread compound or yellow Teflon tape (wrap clockwise, 3–4 turns) to male threads only. Thread the connector onto the gas valve control on the heater, then connect the other end to the gas supply stub. Tighten with two wrenches to avoid twisting the valve body. If using black iron pipe, you’ll thread and assemble fittings as needed, this requires a pipe threader or pre-cut nipples and unions.
Attach the vent pipe. The draft hood slides onto the flue outlet on top of the heater. Vent pipe must slope upward at least 1/4″ per foot of run to ensure proper draft and prevent condensation backflow. Use Type B double-wall vent pipe and secure all joints with sheet metal screws (three per joint). The vent must terminate through the roof or an approved sidewall vent, following manufacturer and code specifications. Improper venting causes carbon monoxide buildup, this is not negotiable.
Before turning anything on, perform a leak test. Open the gas shutoff valve slowly. Mix dish soap and water in a spray bottle and apply it to every gas connection. Watch for bubbles, any bubbling indicates a leak. Tighten fittings as needed and retest. Don’t proceed until all connections are bubble-free.
Open the cold water supply valve and fill the tank. Open a hot water faucet in the house and let it run until water flows steadily without air sputtering (this purges air from the lines). Check all water connections for drips and tighten if needed.
Now light the pilot and fire up the burner according to the manufacturer’s instructions. Most modern units have electronic ignition: older models require manually lighting the pilot with a long lighter while holding down the pilot button. Set the thermostat to 120°F (the EPA-recommended temperature to prevent scalding and reduce energy use).
Finally, schedule your inspection. Don’t use the water heater extensively until it passes. Inspectors verify proper venting, clearances, gas connections, seismic straps, and T&P valve installation.
Common Installation Mistakes to Avoid
Even experienced DIYers slip up on these details:
Using the wrong pipe dope or tape: Standard white Teflon tape is not rated for gas. Always use yellow tape or paste labeled for gas service. Gas and water connections have different requirements.
Improper venting: Undersized vent pipe, insufficient slope, or too many elbows restrict airflow and cause backdrafting. Follow the sizing charts in the installation manual and detailed venting guides to ensure proper draft. Type B vent pipe is required for most gas water heaters, single-wall won’t pass inspection.
Overtightening fittings: It’s tempting to crank down on gas and water fittings, but overtightening can crack valve bodies or strip threads. Snug is enough, watch for leaks and adjust from there.
Skipping the T&P valve discharge pipe: Some installers omit this or terminate it improperly. The discharge pipe must run downward to within 6″ of the floor with no threads at the end. This isn’t optional, it prevents scalding if the valve releases.
Ignoring clearances: Gas water heaters need clearance from combustibles. Typical requirements are 6″ from walls and 18″ in front for service access, but consult your manual and local codes. Don’t box in the heater or store flammables nearby.
Not testing for leaks: “It looks tight” isn’t good enough. Always soap-test gas connections and visually inspect water fittings under pressure.
Setting the thermostat too high: Factory settings are often 140°F or higher. Dial it down to 120°F unless you have a specific need (like a dishwasher without a booster heater). You’ll save energy and reduce scalding risk.
While gas water heater installation demands more caution than electric water heater installation, the process is logical and methodical. Respect the gas, follow the codes, and don’t skip the inspection. Many homeowners also inquire about ongoing upkeep: regular water heater maintenance service can extend the life of your new unit significantly by flushing sediment and checking the anode rod annually. If you’re considering a tankless model instead, factor in that tankless water heater maintenance often requires professional descaling, especially in hard-water areas.
Whether you tackle this yourself or hire it out, understanding the process helps you make informed decisions, ask the right questions, and ensure the work, yours or a contractor’s, is done correctly. The water heater installation cost, whether for a traditional tank or other configurations, is an investment in safety and daily comfort that pays dividends when done right the first time.